Scale out to computing clusters
Sometimes your need to deal with large volume of data and relying on a single machine is simply too slow or restricted for such tasks.
Or you have developed a machine learning procedure using CPU on your local dev server and would like to run it using GPU in production.
Or you would like to experiment thousands of parameter combinations for the same model by running them in parallel.
Under the above circumstances, it is common to scale your local work out to elastic remote computing resources. ConvectHub has provided several ways to achieve such tasks.
Using Dask gateway
Dask is lightweight distributed computing framework written in python and allow runing python code utilizing multiple machines with/without minimal code change.
ConvectHub allows users to start and connect on-demand dask clusters.
To start a cluster, execute the following code from your notebook
from dask_gateway import Gateway
gateway = Gateway()

options = gateway.cluster_options()
options

Once the desired settings have been chosen the user creates a cluster (launches a dask scheduler).

cluster = gateway.new_cluster(options)
cluster
The user is presented with a GUI to scale up the number of workers. At first, users start with 0 workers. In addition you can scale up via Python functions. Additionally the GUI has a dashboard link that you can click to view cluster diagnostics. This link is especially useful for debugging and benchmarking.
cluster.scale(1)
Once you have created a cluster and scaled to an appropriate number of workers we can grab our dask client to start the computation. You may also use the cluster menu with the dashboard link to scale the number of workers.
client = cluster.get_client()
Finally let’s do an example calculation to prove that everything works.
import dask.array as da
x = da.random.random((10000, 10000), chunks=(1000, 1000))
y = x + x.T
z = y[::2, 5000:].mean(axis=1)
z.compute()
If a result was returned, your cluster is working.
For more details to utilize dask framework to expedite your computing workloads, see their doc.
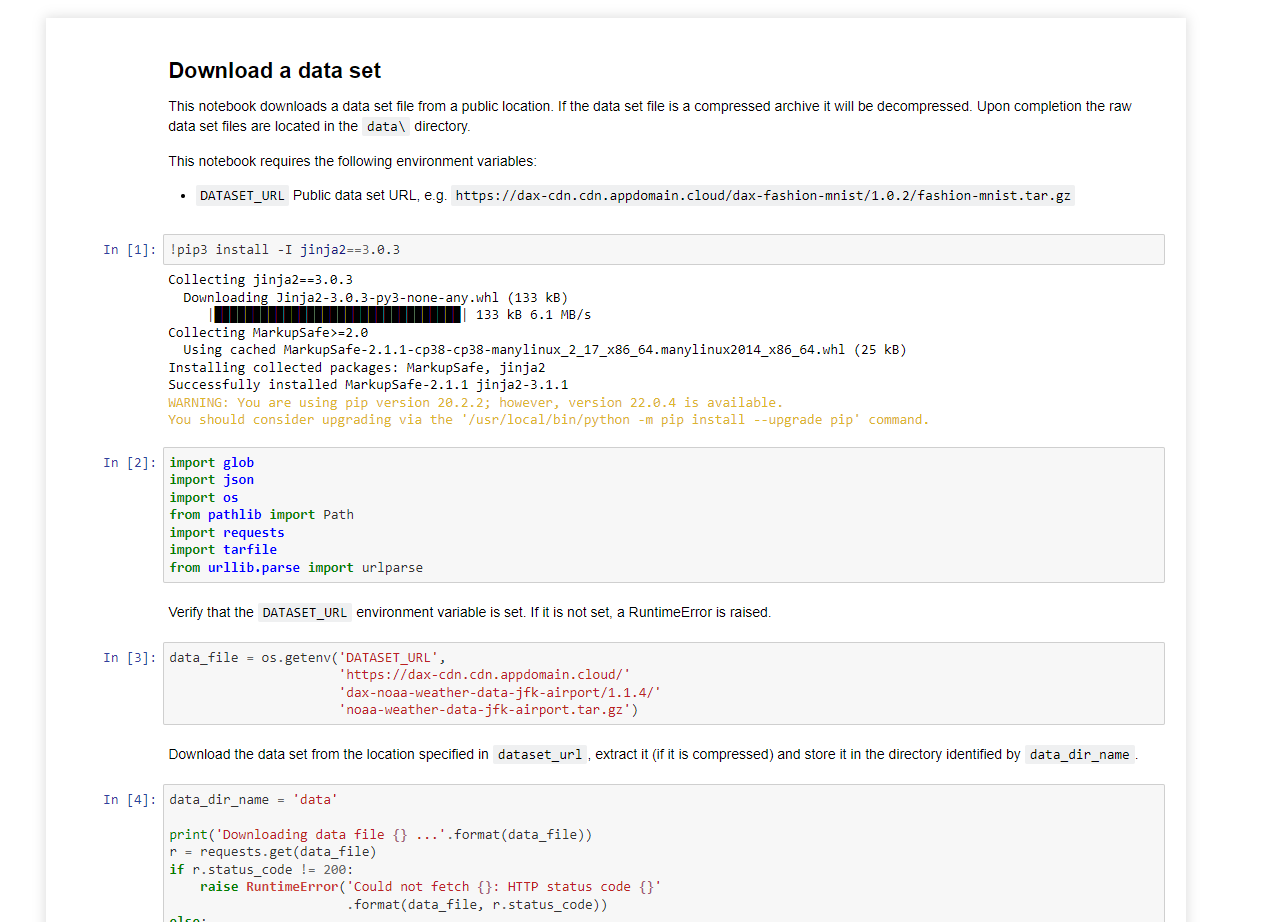
Execute notebook as a remote job
Users can submit a notebook to be executed as a remote job. This is useful for example when
- Users want to evaluate massive amount of jobs with almost identical setups, e.g., a machine learning training procedure with different model parameters. Running those jobs using one machine is too time consuming.
- Users want to utilize remote computing resources. For example, running a job remotely with more CPU and memory resources.
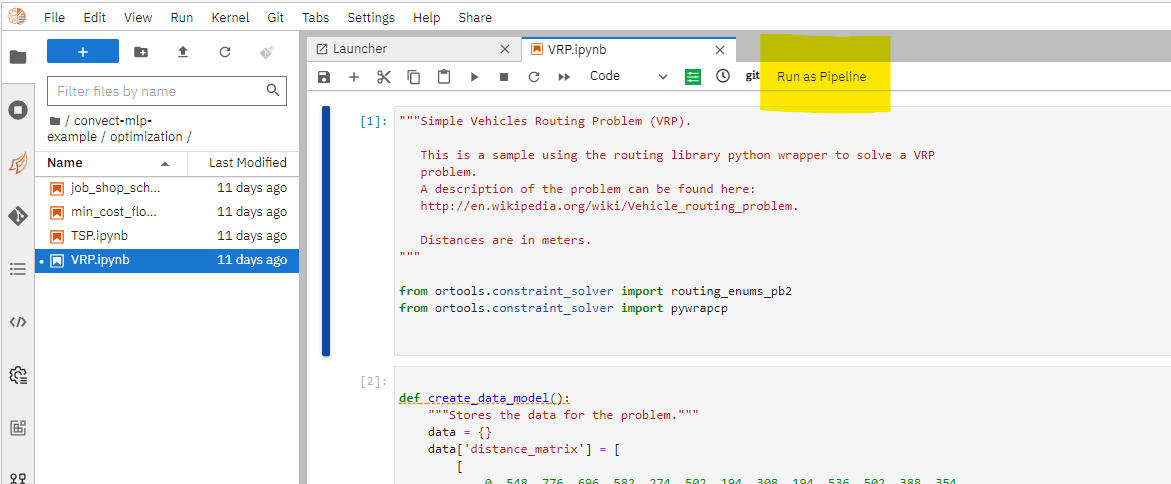
To submit a notebook to be executed remotely, click Run as pipeline button on the top toolbar
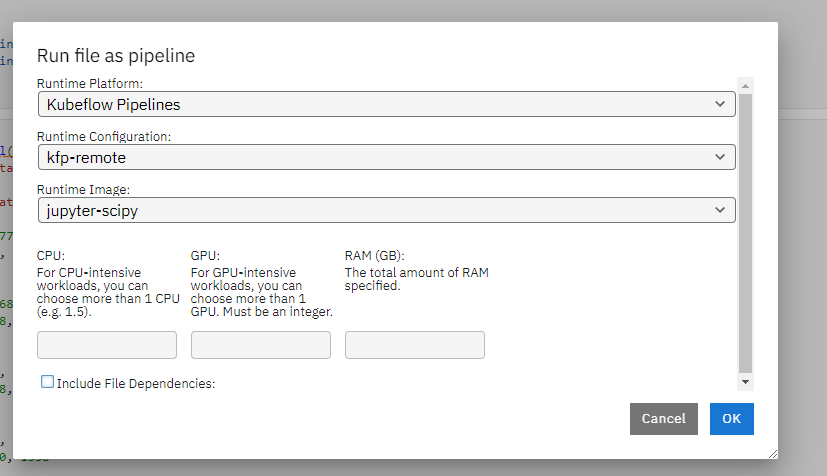
Select the docker image to use as the runtime environment. As a best practice, you should keep the remote runtime image to be as consistent as your local python environment. Specify the resource needed for the remote container that executes the notebook.
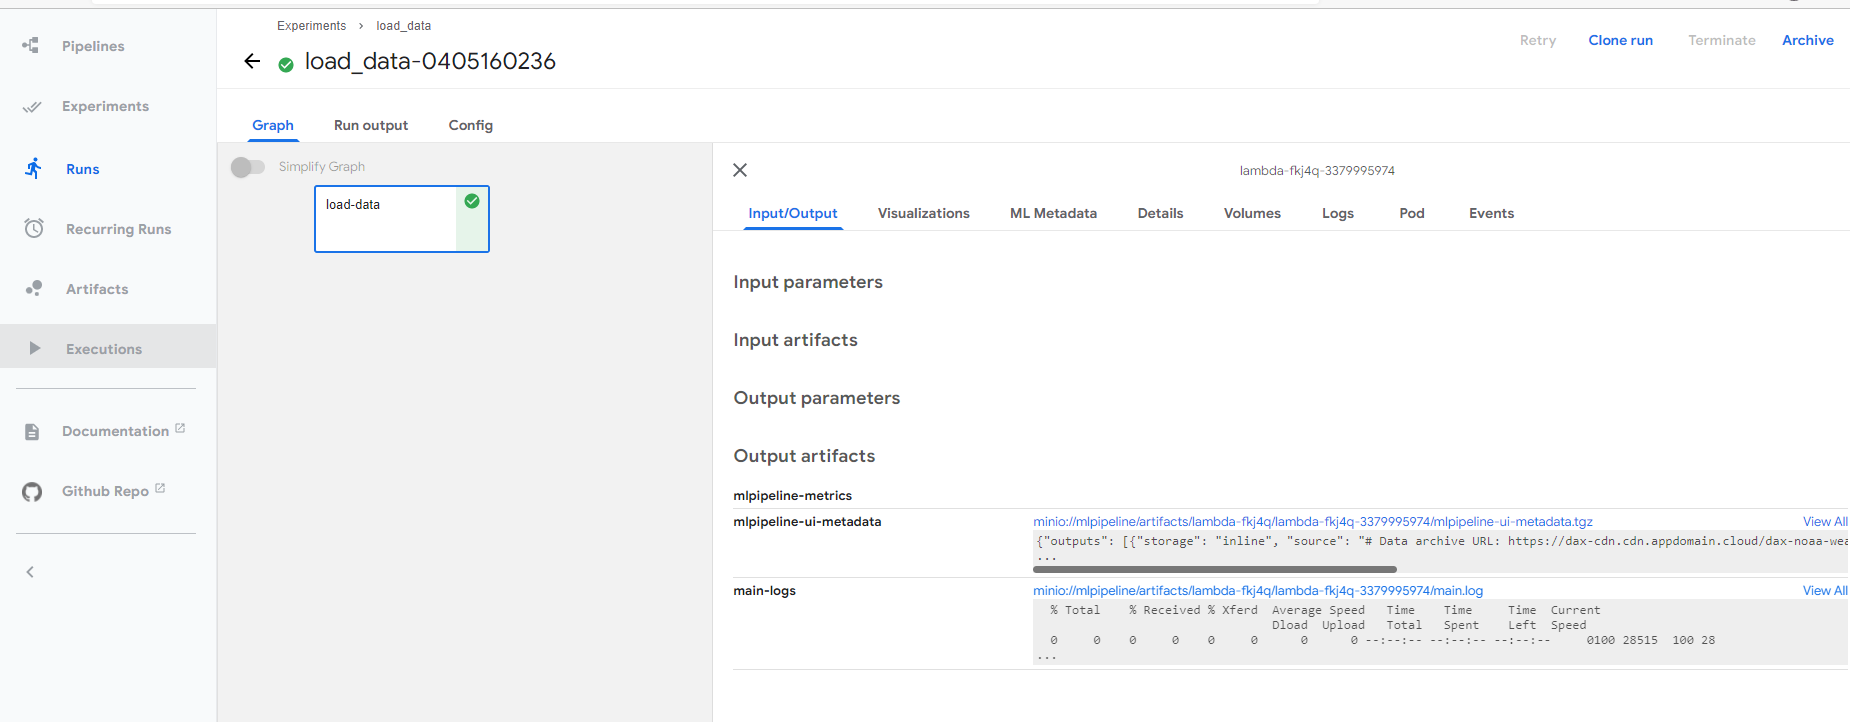
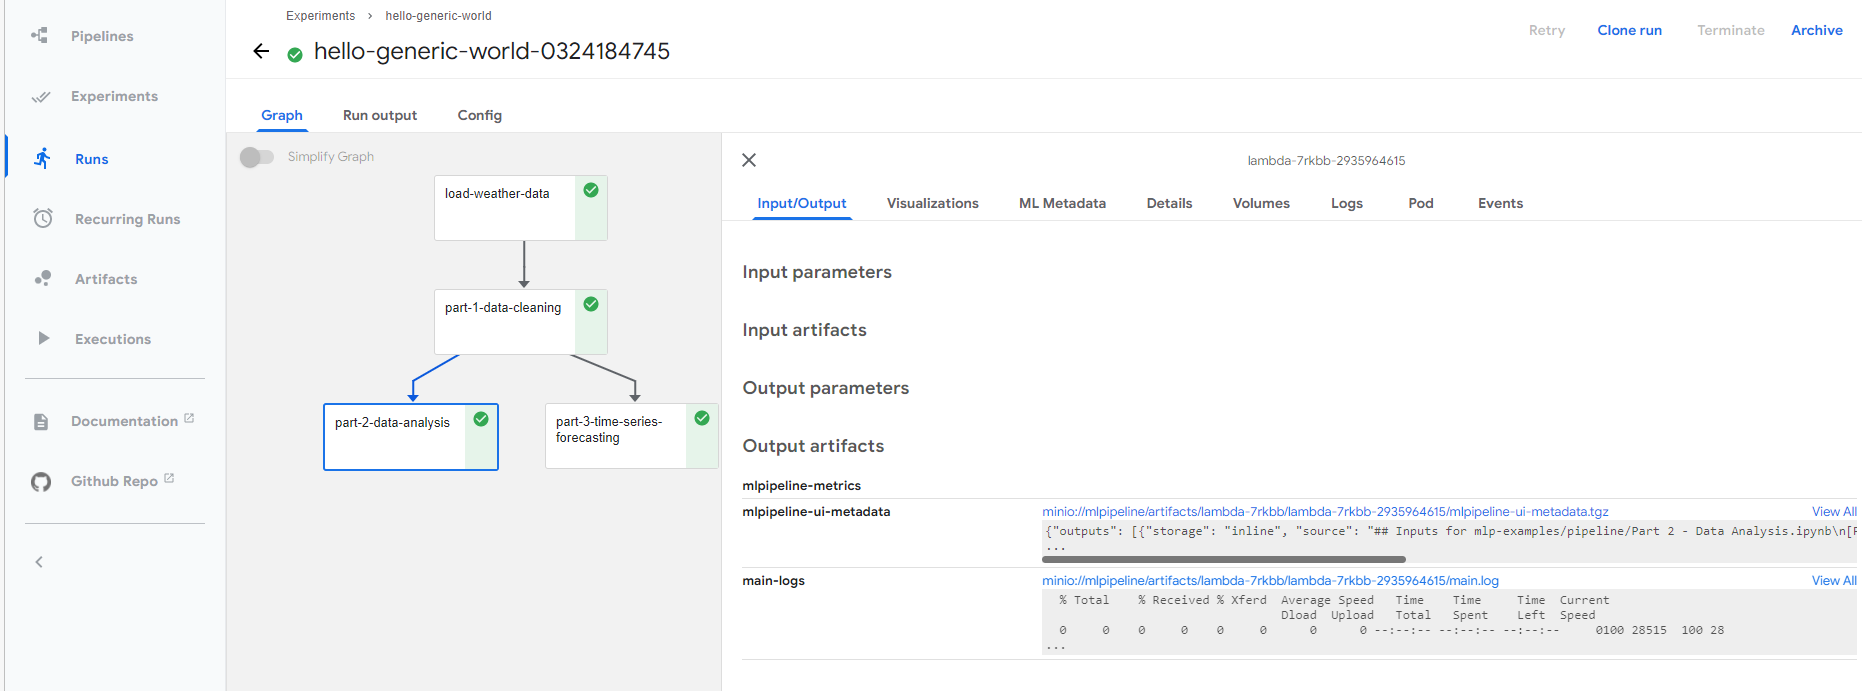
Once successfully submitted, you can view the executing details by follow the link.
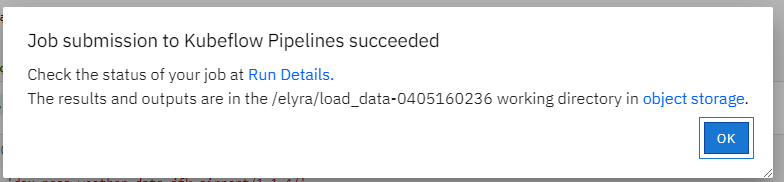
You can download the generated notebook by following the object link path.
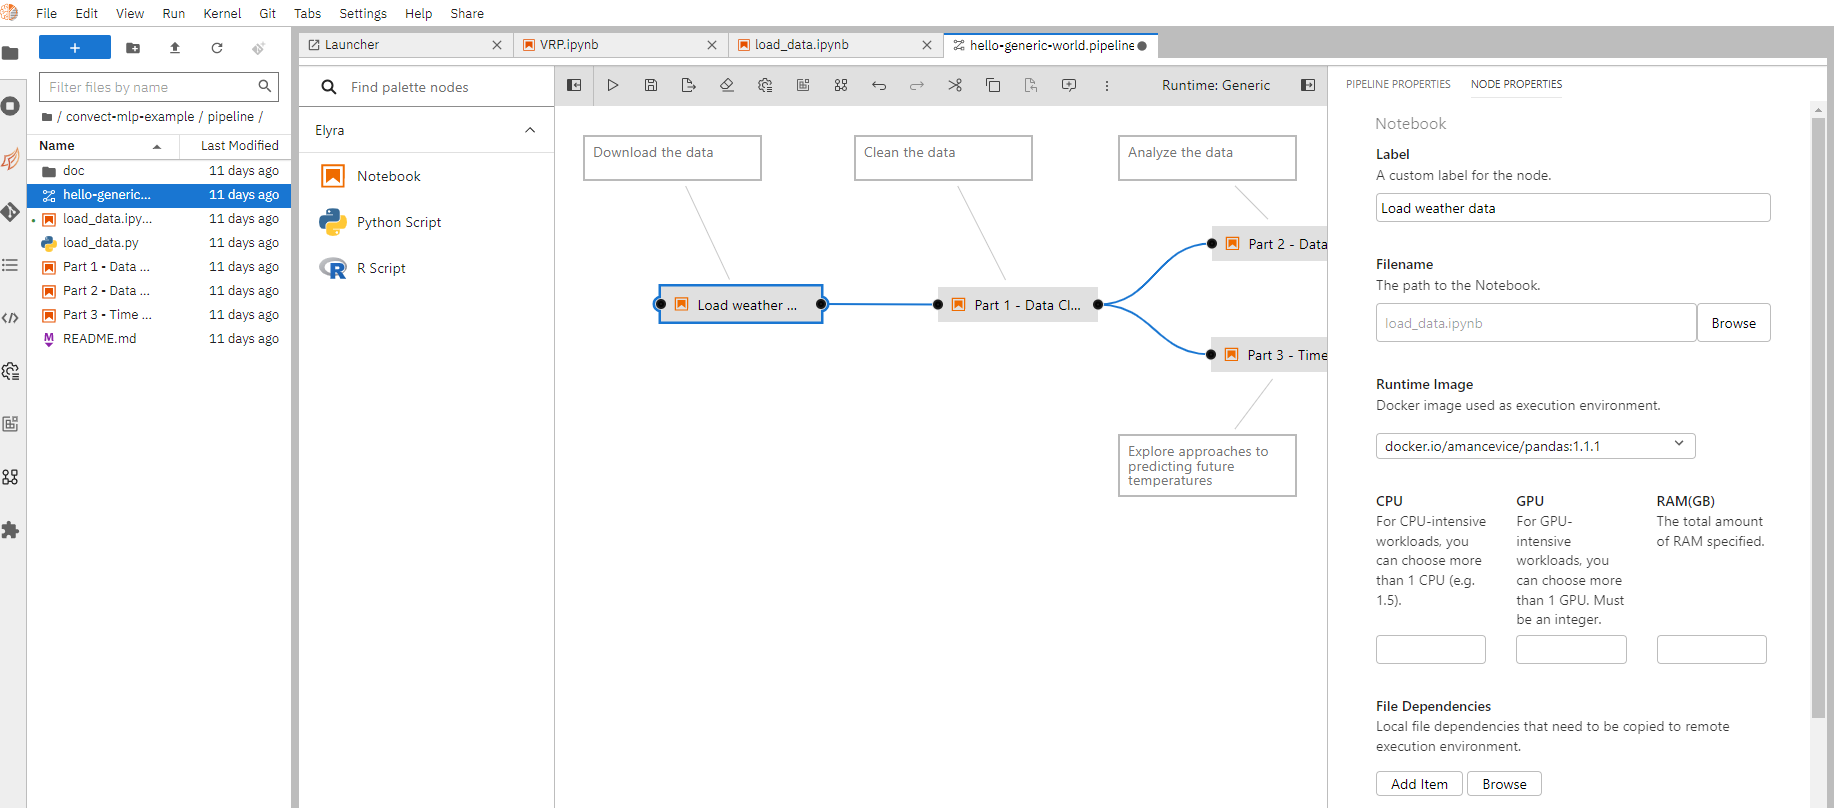
Compose notebooks into a pipeline
You can combine and orchestra several notebooks into a reproducible pipeline. This is useful when you have a complex task that can be decomposed into multiple procedures. For example, a machine learning model development task can be roughly divided into data processing, feature engineering, model training and evaluation. Under such a scenario, you can utilize several notebooks where each one of them is dedicated to one subtask of the large task for better code maintenance and management.
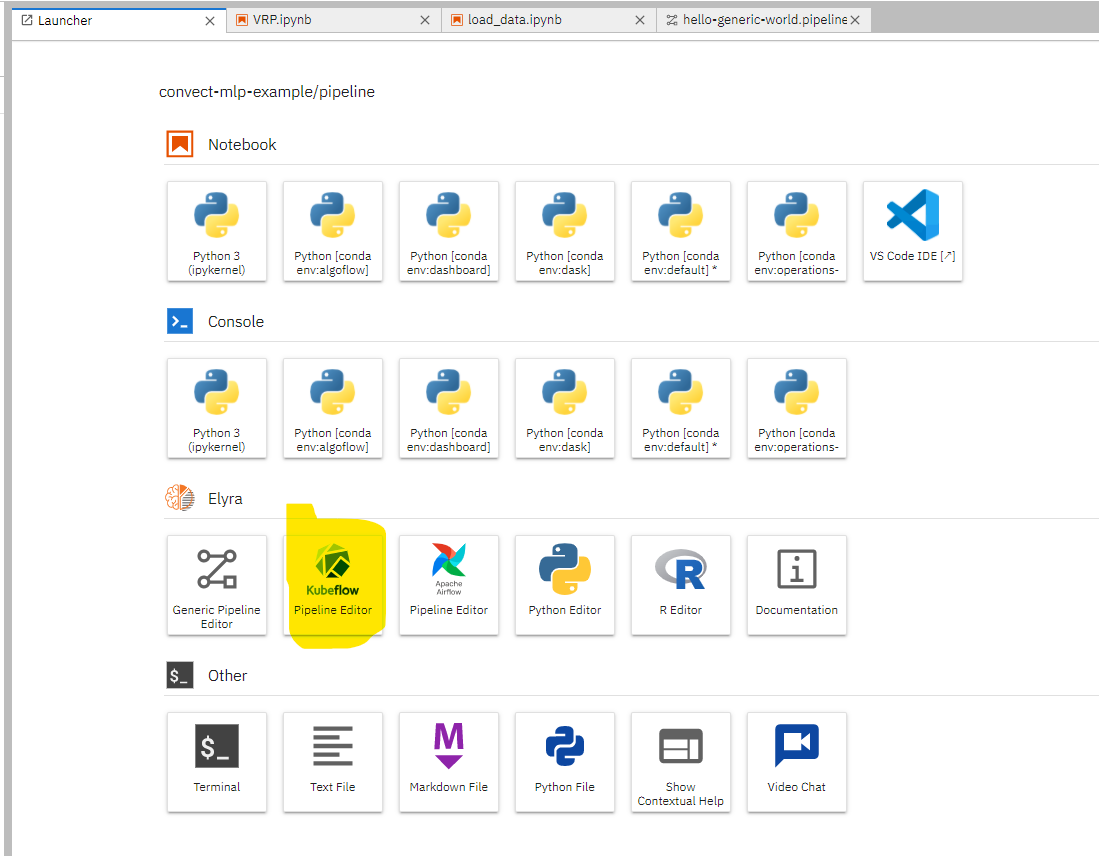
To create a new pipeline, select “Generic pipeline editor” from the launcher. Then drag and drop existing notebooks from the file browser on the left into the main editing area. Connect two notebooks together to specify a dependency relationship between them.
You can right click on each individual notebook node and specify details on how to execute them such as runtime images, computing resources, just like what is done in executing a notebook as a remote job.
Once done, click “Run pipeline” to submit the pipeline as a job.
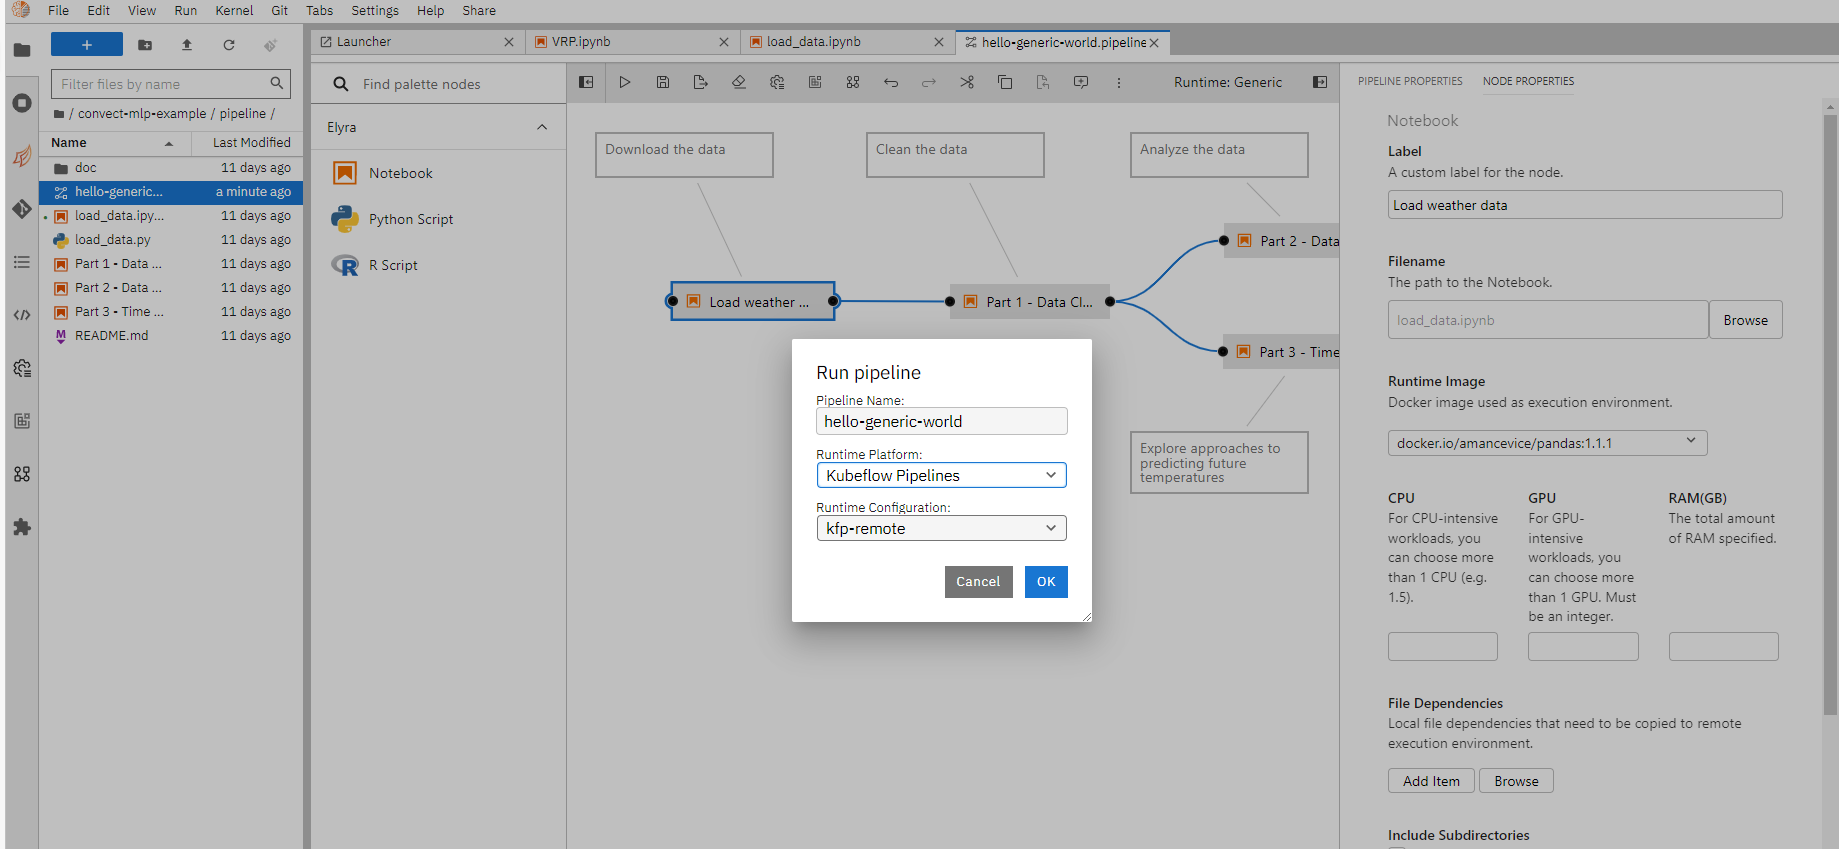
You can follow the run link to view the execution details as mentioned in remote execution section, and download generated notebooks as needed.
Using prebuilt components in a pipeline
When composing a pipeline, it is useful to reuse some prebuilt components that are designed for specific tasks. For example, a procedure that takes in sales data for products and trains a machine learning model that predict the future sales. This helps to expedite the development speed of data science solutions significantly.
ConvectHub supports importing kubeflow pipeline components.
Importing a prebuilt component
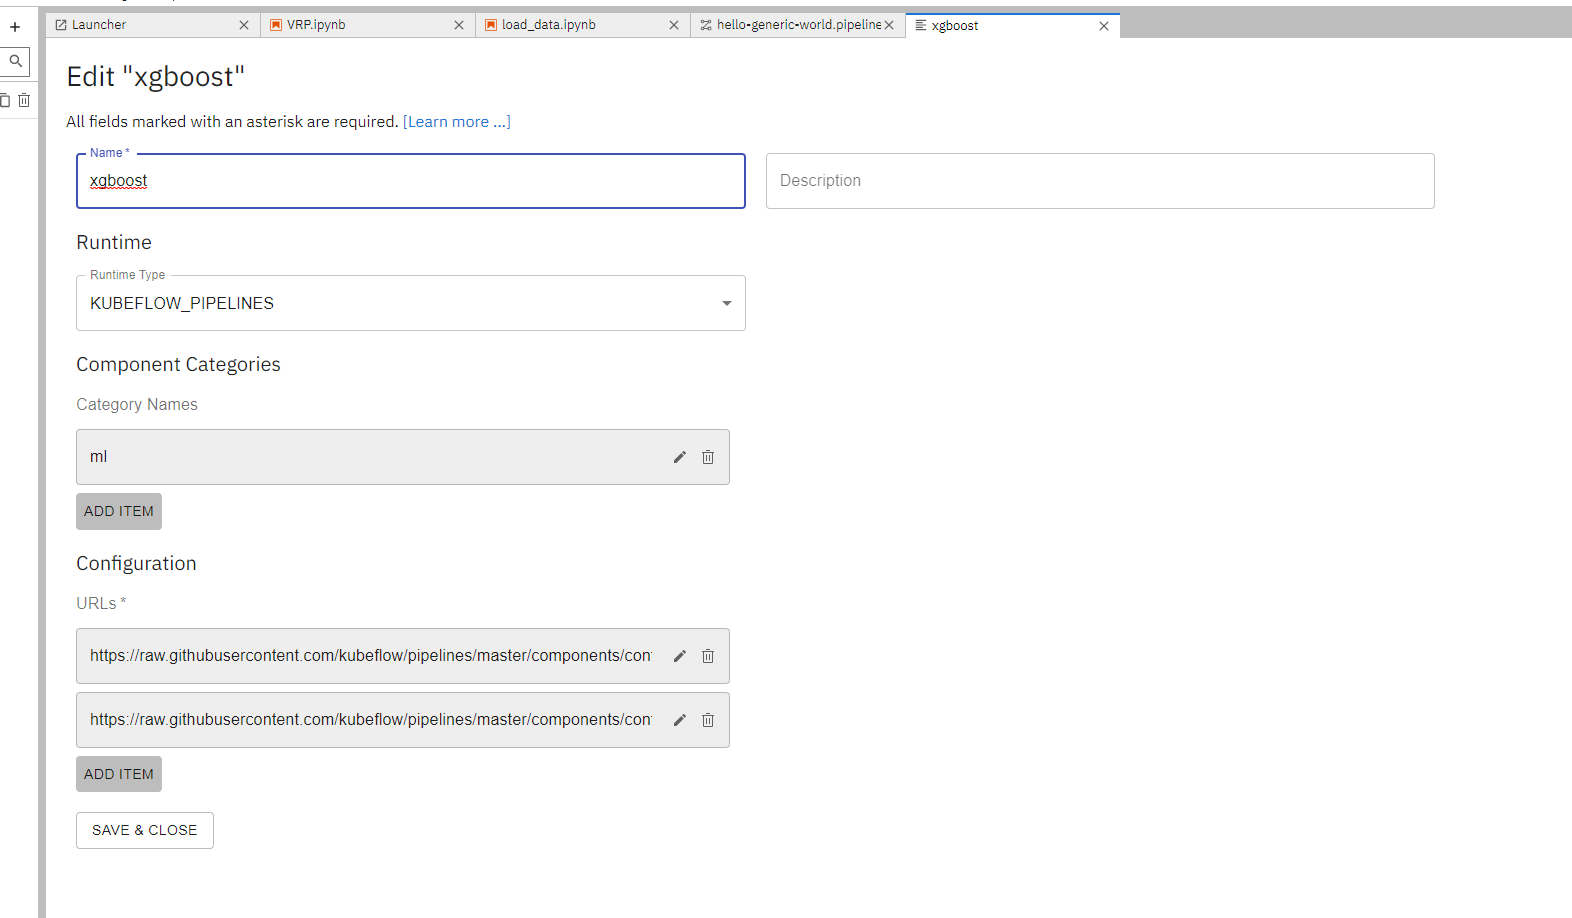
To import a prebuilt component, first locate the URL that points to the component definition yaml file. For example, https://raw.githubusercontent.com/kubeflow/pipelines/master/components/contrib/XGBoost/Train_and_cross-validate_regression/from_CSV/component.yaml is a prebuilt component that trains a xgboost model from a csv file.
Select add “New URL Component Catalog” from the component management page and add the URLs under the “Configuration” section.
Using a prebuilt component
Once imported, create a new pipeline from launcher by clicking “Kubeflow Pipeline Editor”
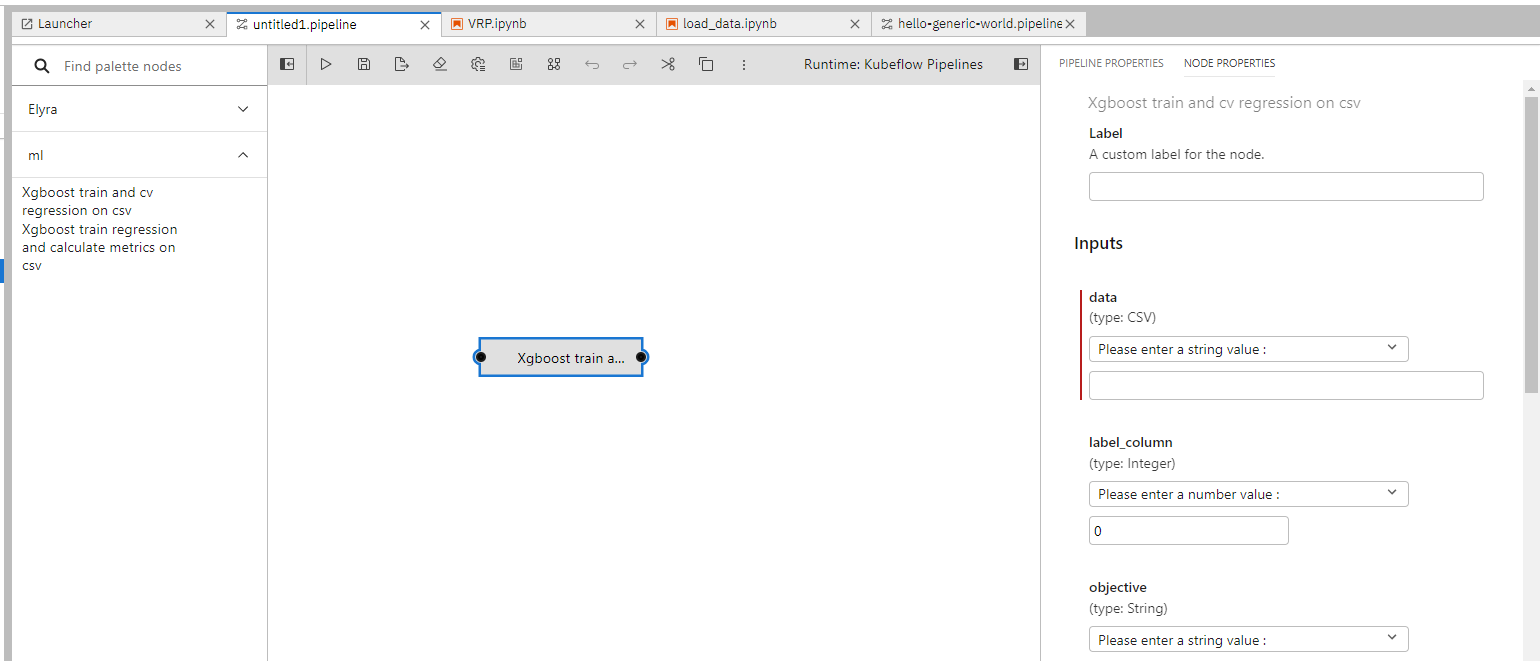
You will be able to view the imported components from the left toolbar and drag and drop them into the editing area as needed. Right click on the nodes can enable editing the execution details about them, such as input parameters, computing resources needed, runtime images.
You can combine prebuilt components with normal notebooks to form a more complex pipeline.
Distributed GPU training
It's common to use multiple GPUs to accelerate machine learning training workloads especially when dealing with large-scale deep learning models. We support distributed training workloads through Kubeflow Training Operators. The most common frameworks are supported.
To submit a distributed training job, roughly we need the following steps: 1. package your code in a docker image; 2. write a yaml config to describe your training environment; 3. submit and wait for your job to finish.
For example, to train a classification model on MNIST using PyTorch, we first package our training script mnist.py into a docker image.
FROM pytorch/pytorch:1.0-cuda10.0-cudnn7-runtime

RUN pip install tensorboardX==1.6.0
RUN mkdir -p /opt/mnist

WORKDIR /opt/mnist/src
ADD mnist.py /opt/mnist/src/mnist.py

RUN  chgrp -R 0 /opt/mnist \
  && chmod -R g+rwX /opt/mnist

ENTRYPOINT ["python", "/opt/mnist/src/mnist.py"]
Then build and push it to a registry.
docker build . -t mnist-simple:latest


docker tag mnist-simple:latest <YOUR_REPO>/mnist-simple:latest
docker push <YOUR_REPO>/mnist-simple:latest
Once finished, we declare a training job by writing an yaml config job.yaml
apiVersion: "kubeflow.org/v1"
kind: "PyTorchJob"
metadata:
  name: "pytorch-dist-mnist-nccl"
spec:
  pytorchReplicaSpecs:
    Master:
      replicas: 1
      restartPolicy: OnFailure
      template:
        metadata:
          annotations:
            sidecar.istio.io/inject: "false"
        spec:
          containers:
            - name: pytorch
        image: <YOUR_REPO>/mnist-simple:latest
              args: ["--backend", "nccl"]
              resources:
                limits:
                  nvidia.com/gpu: 1
    Worker:
      replicas: 1
      restartPolicy: OnFailure
      template:
        metadata:
          annotations:
            sidecar.istio.io/inject: "false"
        spec:
          containers:
            - name: pytorch
              image: <YOUR_REPO>/mnist-simple:latest
              args: ["--backend", "nccl"]
              resources:
                limits:
                  nvidia.com/gpu: 1
This is going to spawn up 1 master and 1 worker both having 1 gpu for the training job.
Then submit the job via command line.
kubectl create -f job.yaml
You can monitor the status of the job by
kubectl get -o yaml pytorchjobs pytorch-simple
We encourage users to refer to the Training Operators Doc to learn more about how to use the framework.